Windows Safety Master is a rogue anti-spyware program from the Rogue.FakeVimes family of computer infections. This program is considered scareware because it displays fake scan results, fake security warnings, and does not allow you to run programs on your computer. Windows Safety Master is distributed through web sites that display a fake online virus scanner that states your computer is infected and then prompts you to download the installation file. This infection is also promoted by hacked web sites that contain exploit code that tries to install the infection on your computer without your permission or knowledge.
When Windows Safety Master is installed it will be configured to automatically start when you login to Windows. Once started, it will pretend to scan your computer and then states that there are numerous infections present. If you attempt to remove any of these supposed infections, the program will state that you first need to purchase a license before being allowed to do so. As all of the scan results are false, please ignore any prompts to purchase the program.
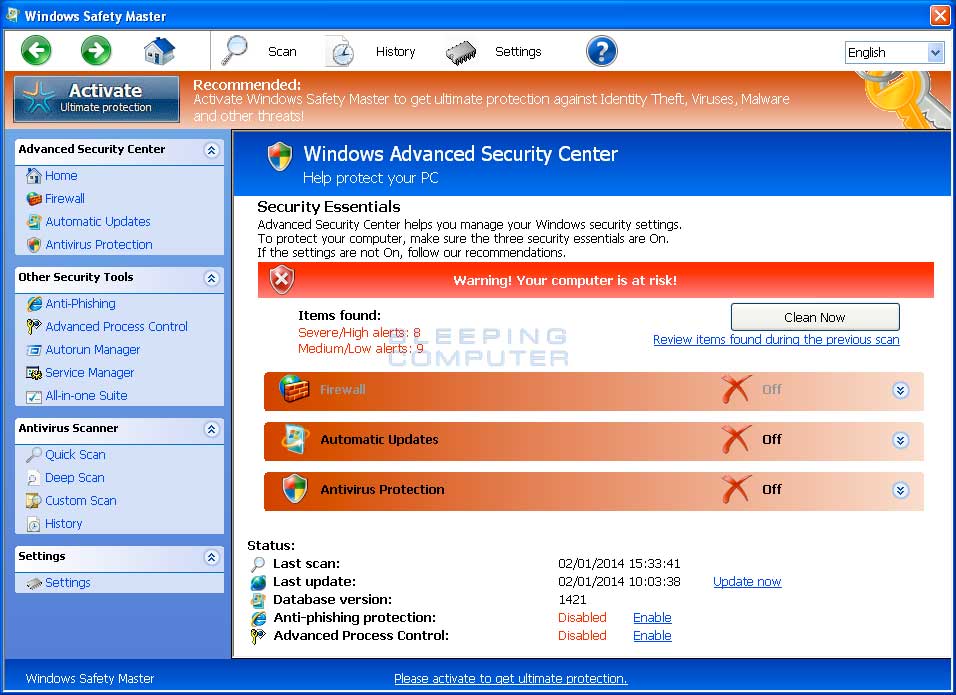
Windows Safety Master screen shot
For more screen shots of this infection click on the image above.
There are a total of 2 images you can view.
To protect itself from being removed, Windows Safety Master will also block you from running any legitimate application on your computer. It does this to prevent you from running legitimate security software that may detect it as an infection and remove it. The message that you will see when you attempt to run a program is:
Firewall has blocked a program from accessing the Internet
C:\Program Files\Internet Explorer\iexplore.exe
is suspected to have infected your PC.
This type of virus intercepts entered data and transmits them
to a remote server.
When you see this message please ignore it as your programs are not infected and will work normally after this infection is removed.
While Windows Safety Master is running it will also display fake security alerts that are designed to make you think your computer has a severe security problem. Some of these warnings include:
Error
Trojan activity detected. System integrity at risk.
Full system scan is highly recommended.Error
System data security is at risk!
To prevent potential PC errors, run a full system scan.Warning! Identity theft attempt detected
Hidden connection IP: xx.xxx.xxx.xxx
Target: Microsoft Corporation keys
Your IP: 127.0.0.1
Just like the scan results, these warnings are fake and can be ignored.
As you can see, this infection was created for the sole reason of scaring you into purchasing it. It goes without saying that you should definitely not purchase Windows Safety Master, and if you already have, please contact your credit card company and dispute the charges stating that the program is a scam and a computer virus. To remove Windows Safety Master and other related malware, please use the free removal guide below.
Threat Classification:
Advanced information:
View Windows Safety Master files.
View Windows Safety Master Registry Information.
Tools Needed for this fix:
Guide Updates:
02/01/14 - Initial guide creation.
Automated Removal Instructions for Windows Safety Master using Malwarebytes Anti-Malware:
- For the first part of this removal guide you will need to use a different computer than the infected one in order to download and save some files that we need for the fix.
- On a clean computer, start a web browser and download and save the following Windows Registry file to your desktop from the link below:
http://download.bleepingcomputer.com/reg/RemVimes.reg
- When the file has finished downloading, please burn it on to a CD or save it to a USB drive so that we can transfer the file to the infected computer.
- When you have finished saving the RemVimes.reg registry file to a removable media, please reboot the infected computer. While the computer is starting please being to repeatedly tap the F8 key on your keyboard. This will open up the Advanced Boot Options screen, in Windows 7 or Vista, or the Windows Advanced Options Menu in Windows XP. The screen that you need to get to will look similar to the one below.
At the above screen you will see a variety of options that can be used to boot Windows. Using the arrow keys on your keyboard, highlight the option labeled Safe Mode with Command Prompt. Once it is highlighted, click on the Enter key on your keyboard.
- Windows will now start and if you have multiple accounts or a password on your single account, you will be presented with a screen asking you to login to Windows. Please select your account and enter any password that you may have. When done, the Windows Command Prompt will open and you will see a screen similar to the one below.

The Command Prompt allows you to type commands and then press Enter on your keyboard to execute them. In this Command Prompt window, please typeexplorer.exe and then press Enter on your keyboard.
- The Windows desktop will now appear. When the desktop appears you can then close the Command Prompt window by clicking on the X.
- Now insert your CD or USB drive and open up the drive letter associated with your inserted media. You can access this drive letter by opening the Computer icon on your desktop or from the Start Menu. Once the drive letter is open, double-click on the RemVimes.reg and allow the data to be merged when you are prompted. Once the data has been merged, you can press the OK button and remove the removable media from your computer.
- Please reboot your computer into the normal Windows mode and login as the infected user. When you are back at your normal Windows desktop please continue with the next step.
- Now that you are at your normal Windows desktop, you should download Malwarebytes Anti-Malware, or MBAM, from the following location and save it to your desktop:
Malwarebytes Anti-Malware Download Link (Download page will open in a new window) - Once downloaded, close all programs and Windows on your computer, including this one.
- Double-click on the icon on your desktop named mbam-setup.exe. This will start the installation of MBAM onto your computer.
- When the installation begins, keep following the prompts in order to continue with the installation process. Do not make any changes to default settings and when the program has finished installing, make sure you leave both the Update Malwarebytes Anti-Malware and Launch Malwarebytes Anti-Malware checked. Then click on the Finish button. If MalwareBytes' prompts you to reboot, please do not do so.
- MBAM will now automatically start and you will see a message stating that you should update the program before performing a scan. As MBAM will automatically update itself after the install, you can press the OK button to close that box and you will now be at the main program as shown below.
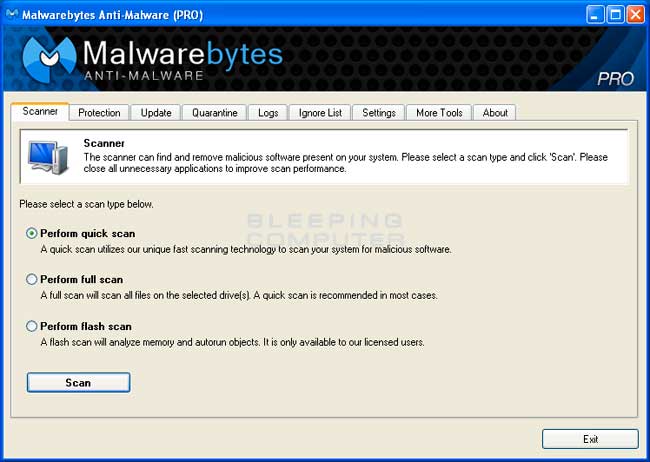
- On the Scanner tab, make sure the the Perform full scan option is selected and then click on the Scan button to start scanning your computer for Windows Safety Master related files.
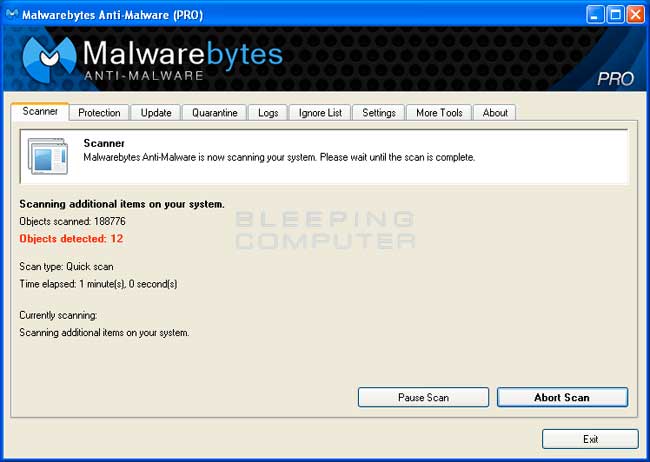
- MBAM will now start scanning your computer for malware. This process can take quite a while, so we suggest you go and do something else and periodically check on the status of the scan. When MBAM is scanning it will look like the image below.
- When the scan is finished a message box will appear as shown in the image below.
You should click on the OK button to close the message box and continue with the Windows Safety Master removal process.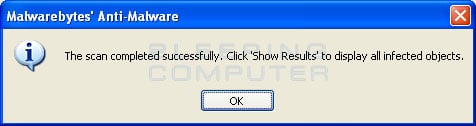
- You will now be back at the main Scanner screen. At this point you should click on the Show Results button.
- A screen displaying all the malware that the program found will be shown as seen in the image below. Please note that the infections found may be different than what is shown in the image.
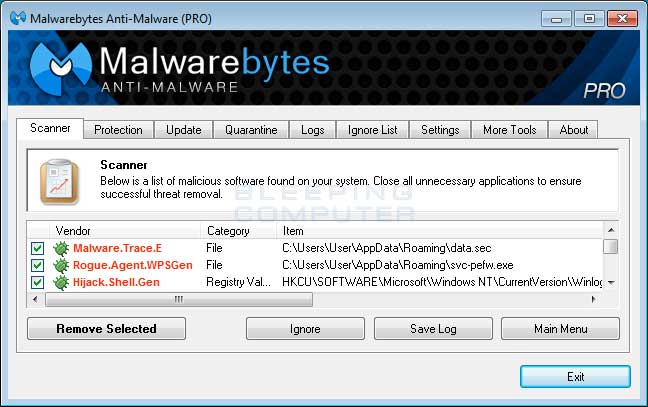
You should now click on the Remove Selected button to remove all the listed malware. MBAM will now delete all of the files and registry keys and add them to the programs quarantine. When removing the files, MBAM may require a reboot in order to remove some of them. If it displays a message stating that it needs to reboot, please allow it to do so. Once your computer has rebooted, and you are logged in, please continue with the rest of the steps.
- When MBAM has finished removing the malware, it will open the scan log and display it in Notepad. Review the log as desired, and then close the Notepad window.
- You can now exit the MBAM program.
- As this infection is known to be installed by vulnerabilities in out-dated and insecure programs, it is strongly suggested that you use Secunia PSI to scan for vulnerable programs on your computer. A tutorial on how to use Secunia PSI to scan for vulnerable programs can be found here:
How to detect vulnerable and out-dated programs using Secunia Personal Software Inspector
Your computer should now be free of the Windows Safety Master infection. If your current anti-virus solution let this infection through, you may want to considerpurchasing the full version of Emsisoft Anti-malware to protect your computer against these types of threats in the future.
If you are still having problems with your computer after completing these instructions, then please follow the steps outlined in the topic linked below:
Preparation Guide For Use Before Using Malware Removal Tools and Requesting Help
Associated Windows Safety Master Files:
%AppData%\svc-<random>.exe
%AppData%\data.secFile Location Notes:
%AppData% refers to the current users Application Data folder. By default, this is C:\Documents and Settings\<Current User>\Application Data for Windows 2000/XP. For Windows Vista and Windows 7 it is C:\Users\<Current User>\AppData\Roaming.
Associated Windows Safety Master Windows Registry Information:
HKEY_LOCAL_MACHINE\SOFTWARE\Microsoft\Windows NT\CurrentVersion\Image File Execution Options\k9filter.exe
HKEY_LOCAL_MACHINE\SOFTWARE\Microsoft\Windows NT\CurrentVersion\Image File Execution Options\MpCmdRun.exe
HKEY_LOCAL_MACHINE\SOFTWARE\Microsoft\Windows NT\CurrentVersion\Image File Execution Options\MpUXSrv.exe
HKEY_LOCAL_MACHINE\SOFTWARE\Microsoft\Windows NT\CurrentVersion\Image File Execution Options\MSASCui.exe
HKEY_LOCAL_MACHINE\SOFTWARE\Microsoft\Windows NT\CurrentVersion\Image File Execution Options\msconfig.exe
HKEY_LOCAL_MACHINE\SOFTWARE\Microsoft\Windows NT\CurrentVersion\Image File Execution Options\msmpeng.exe
HKEY_LOCAL_MACHINE\SOFTWARE\Microsoft\Windows NT\CurrentVersion\Image File Execution Options\msseces.exe
HKEY_LOCAL_MACHINE\SOFTWARE\Microsoft\Windows NT\CurrentVersion\SPP
HKEY_LOCAL_MACHINE\SYSTEM\CurrentControlSet\Services\bckd
HKEY_LOCAL_MACHINE\SYSTEM\CurrentControlSet\Services\bckd "ImagePath" = "123123.sys"
HKEY_CURRENT_USER\Software\Microsoft\Windows\CurrentVersion\Policies\Associations "LowRiskFileTypes" = ".zip;.rar;.nfo;.txt;.exe;.bat;.com;.cmd;.reg;.msi;.htm;.html;.gif;.bmp;.jpg;.avi;.mpg;.mpeg;.mov;.mp3;.m3u;.wav;"
HKEY_CURRENT_USER\Software\Microsoft\Windows\CurrentVersion\Policies\Attachments "SaveZoneInformation" = 1
HKEY_CURRENT_USER\Software\Microsoft\Windows\CurrentVersion\Run "GuardSoftware" = %AppData%\svc-<random>.exe
HKEY_CURRENT_USER\Software\Microsoft\Windows NT\CurrentVersion\Winlogon "Shell" = "%AppData%\svc-<random>.exe"
HKEY_LOCAL_MACHINE\SOFTWARE\Microsoft\Windows\CurrentVersion\policies\system "ConsentPromptBehaviorAdmin" = 0
HKEY_LOCAL_MACHINE\SOFTWARE\Microsoft\Windows\CurrentVersion\policies\system "ConsentPromptBehaviorUser" = 0
HKEY_LOCAL_MACHINE\SOFTWARE\Microsoft\Windows\CurrentVersion\policies\system "EnableLUA" = 0
HKEY_LOCAL_MACHINE\SOFTWARE\Microsoft\Windows\CurrentVersion\policies\system "EnableVirtualization" = 0